IntegralPatcher
info
This document is based on IntegralPatcher 1.1.
Preparation
- IntegralPatcher
- Avatar Unity Project with VCC
- Integral 0.25.0
When using Integral camera
warning
Integral camera is not for filming! Integral camera is intended to be used for photographing.
Instaling for first time
- If you’ve created a new project, import with following order:
Avatar > Integral > IntegralPatcher.
If you’re using an existing project, import with following order:Integral > IntegralPatcher. - Drag & drop
Assets > harunadev > PrismStudio > IntegralPatcher > Patcherprefab to Hierarchy.

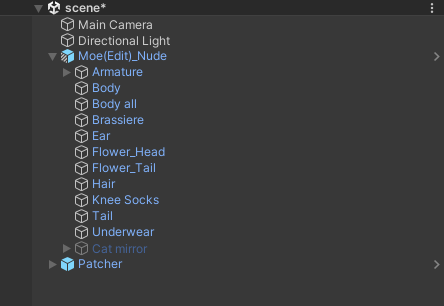
- Drag & drop
Assets > SuzuFactory > Integral > Integralprefab to your avatar.
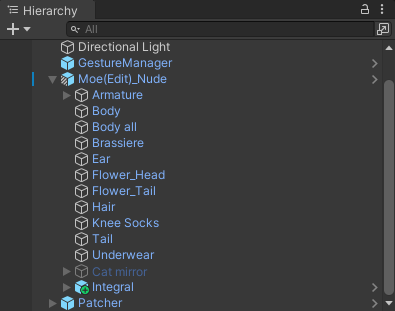
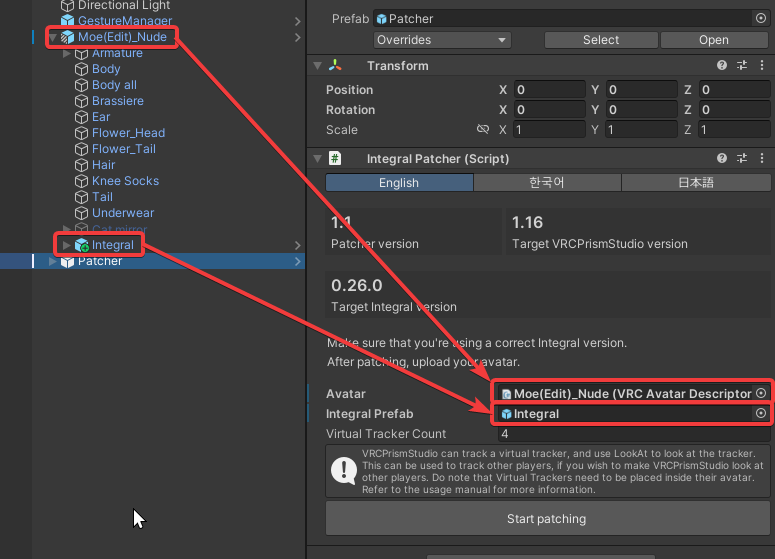
- Select Patcher, Insert your avatar to Avatar, Integral to Integral Prefab, and configure the max number of VirtualTrackers this avatar can track. After everything has been inserted, Press the patch button.
- Manually check whether the patch is successful, by checking if there’s PrismStudio object inside the avatar.
- Patch complete! You can upload your avatar now.
Updating previous patch
- Import new version of IntegralPatcher.
- Remove PrismStudio object from your avatar.
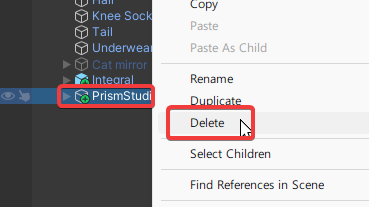
- Select Integral prefab, and locate to
Overrides > Revert Allto revert all changes to original.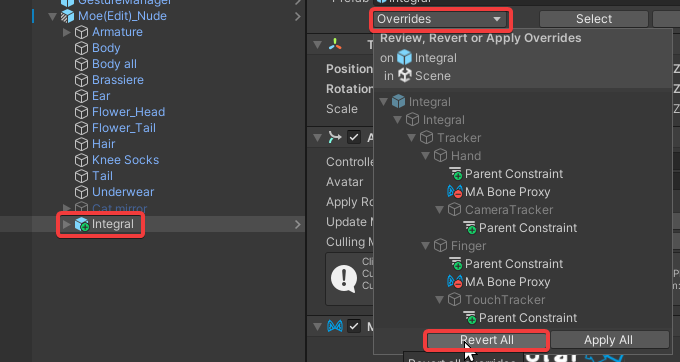
- Drag & drop
Assets > harunadev > PrismStudio > IntegralPatcher > Patcherprefab to Hierarchy.


- Drag & drop
Assets > SuzuFactory > Integral > Integralprefab to your avatar.

- Select Patcher, Insert your avatar to Avatar, Integral to Integral Prefab, and configure the max number of VirtualTrackers this avatar can track. After everything has been inserted, Press the patch button.

- Manually check whether the patch is successful, by checking if there’s PrismStudio object inside the avatar.
- Patch complete! You can upload your avatar now.