VRCLensPatcher
info
This document is based on VRCLensPatcher 1.11.
Preparation
- VRCLensPatcher
- Avatar Unity Project that uses VCC
- VRCLens 1.9.2
First time installing PrismStudio to your avi
- If you’re starting from ground, please import the following in an order: Avatar > VRCLens > VRCLensPatcher.
If you’re using an existing avatar project, please import the following in an order: VRCLens > VRCLensPatcher. - Locate the option
harunadev > PrismStudio > VRCLensPatcher, and press it.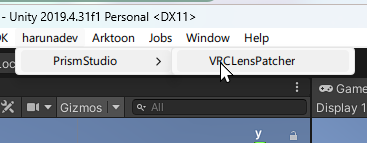
- Check the target VRCLens version, and installed VRCLens version so that it’s identical.
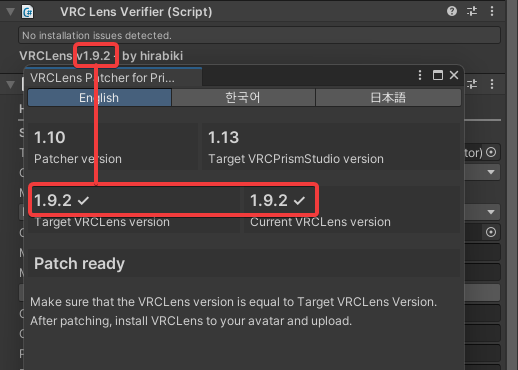
- Configure how many Virtual trackers would you like to use, press the Start patching button and wait for moment.
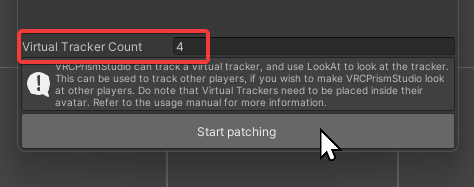
- After the success dialog, press the confirm button and close VRCLensPatcher.
- Check if PrismStudio patch is applied successfully. You can see by checking if the folder
PrismStudioexists.
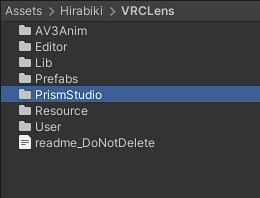
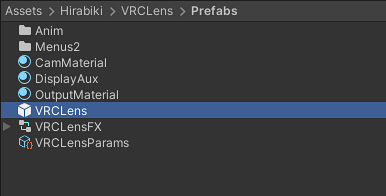
- Bring the VRCLens prefab from Prefabs folder to start configuring VRCLens.
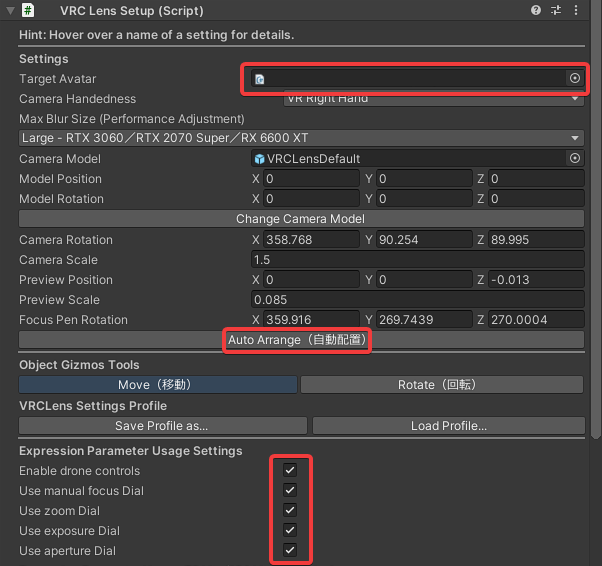
- Configure VRCLens. The options shown as a red box is required for PrismStudio.
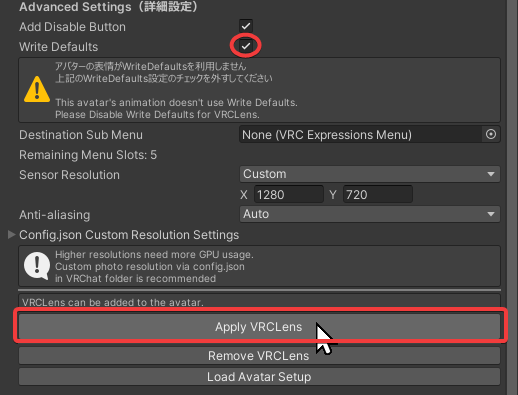
- Enable Write Defaults. You can dismiss the warning. Press the Apply VRCLens to start installing VRCLens to your avatar.
note
There may be a popup saying about Write Default. Press No to ignore.
- After installing VRCLens, check your avatar FX animator, and see if the PrismStudio functions are applied.
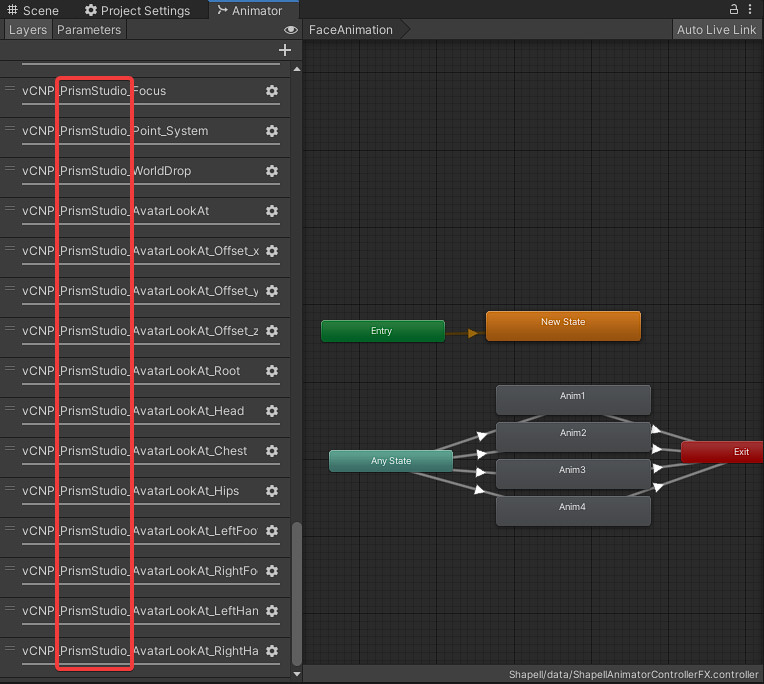
- Patch success! Now it’s time to upload.
Updating previous PrismStudio avi
- Import the new version of VRCLensPatcher.
- Delete the following folders from VRCLens folder.
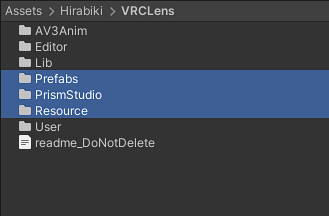
- Reimport VRCLens.
- Locate the option
harunadev > PrismStudio > VRCLensPatcher, and press it.
- Check the target VRCLens version, and installed VRCLens version so that it’s identical.

- Configure how many Virtual trackers would you like to use, press the Start patching button and wait for moment.

- After the success dialog, press the confirm button and close VRCLensPatcher.
- Check if PrismStudio patch is applied successfully. You can see by checking if the folder
PrismStudioexists.

- Bring the VRCLens prefab from Prefabs folder to start configuring VRCLens.

- Configure VRCLens. The options shown as a red box is required for PrismStudio.

- Enable Write Defaults. You can dismiss the warning. Press the Apply VRCLens to start installing VRCLens to your avatar.

note
There may be a popup saying about Write Default. Press No to ignore.
- After installing VRCLens, check your avatar FX animator, and see if the PrismStudio functions are applied.

- Patch success! Now it’s time to upload.